Sewer Camera Inspection Process: A Complete Guide
Sewer problems often begin underground, where homeowners cannot see them. Slow drains, repeated clogs, gurgling toilets, or sewer odors may indicate a main line issue, but these symptoms don't always reveal the exact cause.
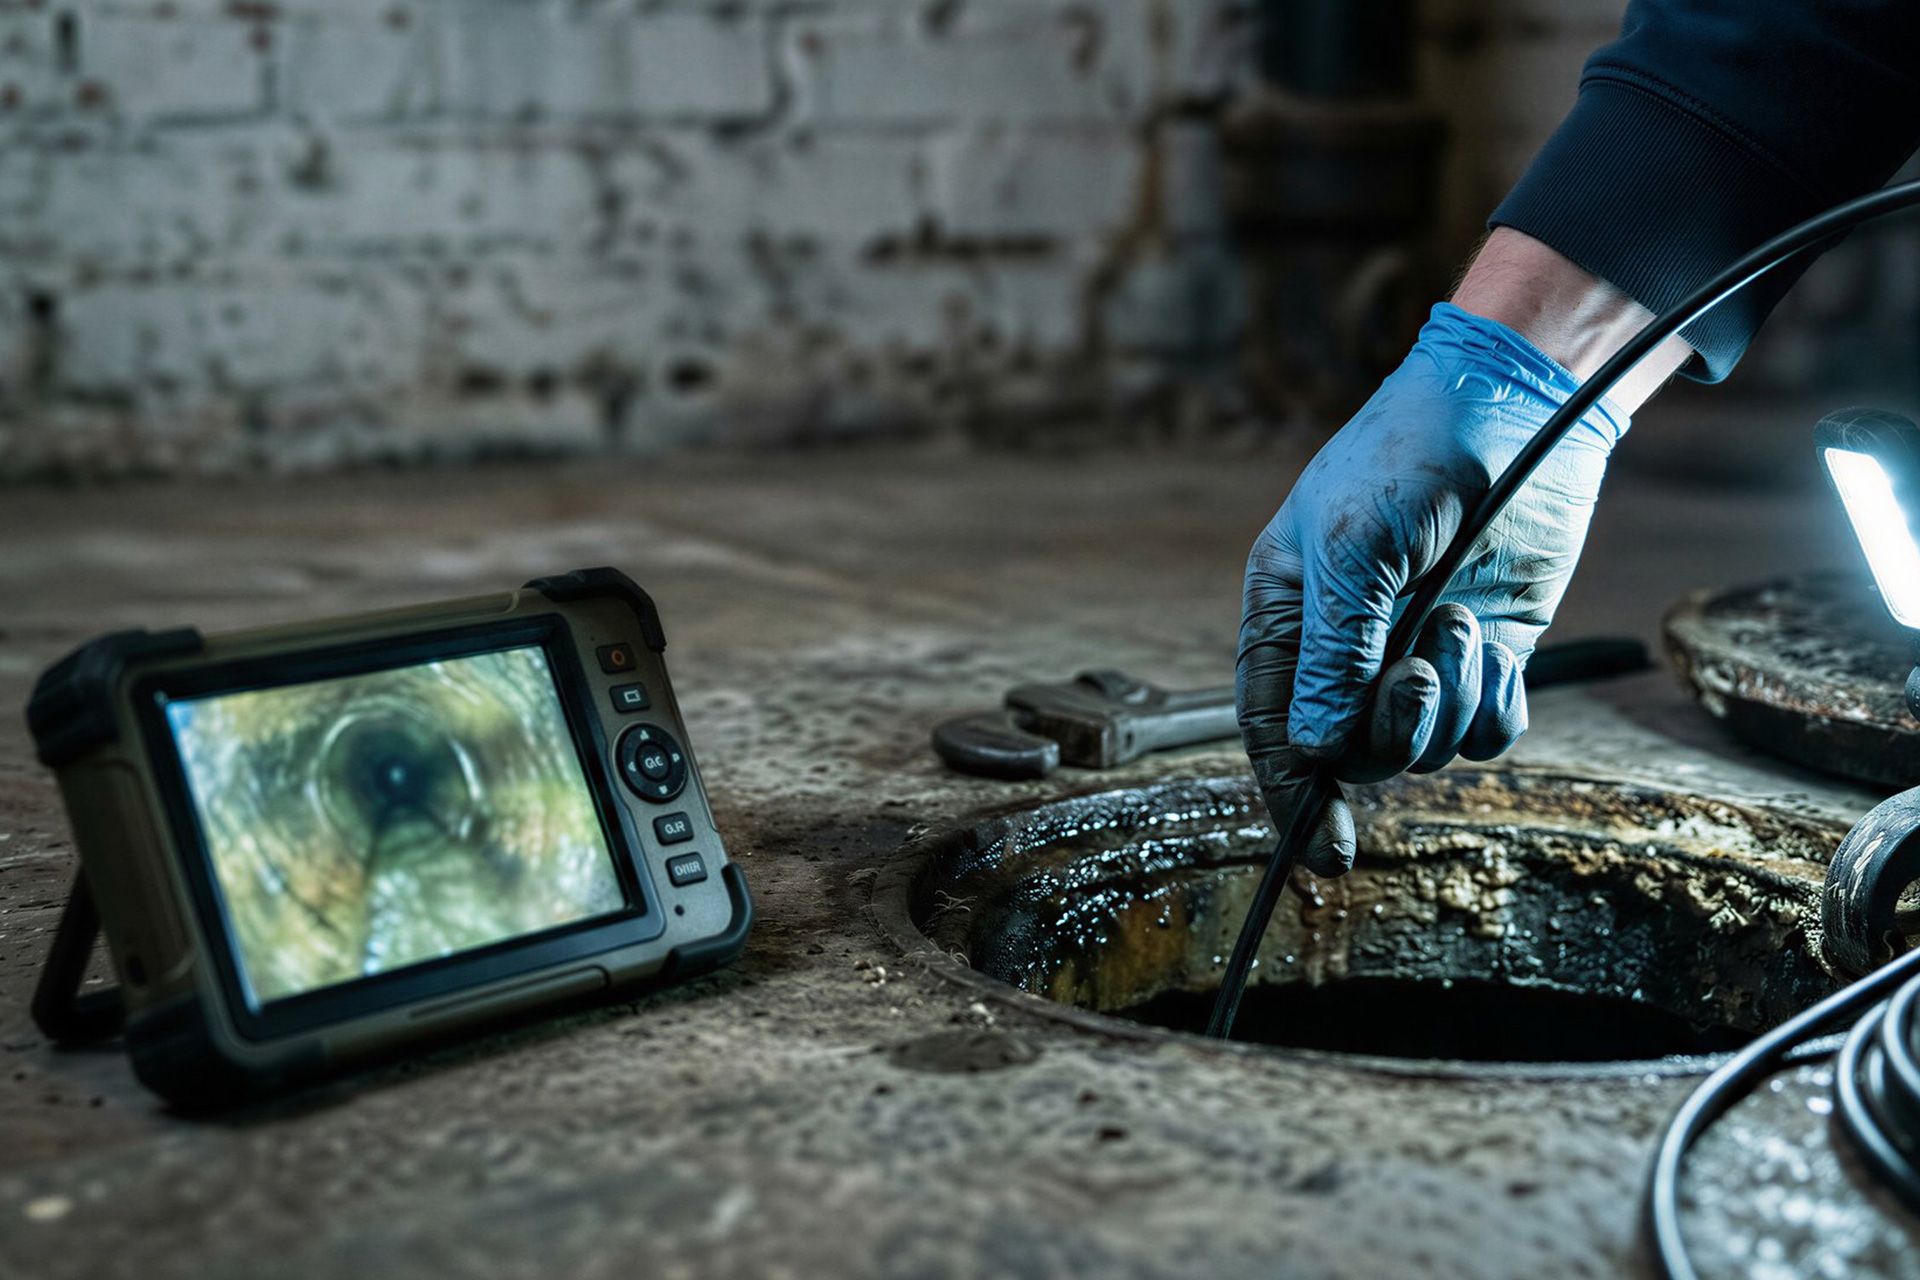
A camera inspection provides a direct view inside the pipe without digging up the yard. A small waterproof camera travels through the line while the inspector watches live footage and looks for blockages, roots, cracks, corrosion, sagging areas, or damaged joints.
Understanding the sewer camera inspection process helps homeowners and buyers know what to expect, what the camera can reveal, and what the findings may mean for future maintenance or repairs.
Sewer Camera Inspection Details
It uses a waterproof camera attached to a flexible cable. The camera is inserted through an accessible cleanout or other suitable entry point and guided through the sewer pipe. As the camera moves, it sends live video to a monitor. This allows the inspector to review the pipe's interior condition in real time.
The goal is to identify problems that are not visible during a standard property walkthrough. The inspection may reveal pipe material, buildup, roots, damaged joints, standing water, cracks, corrosion, or collapsed sections.
A sewer video inspection is diagnostic. It shows what is happening inside the pipe, but it does not clear blockages or repair damage.
Now let’s find out the exact camera inspection process in detail.
Step 1: Find a Suitable Access Point
The first part of the sewer camera inspection process is locating a safe, suitable entry point.
A dedicated sewer cleanout is usually preferred because it provides direct access to the main line. Cleanouts are often located outside the home, near the foundation, in a garage, or in another accessible plumbing area.
If a cleanout is unavailable or inaccessible, you may need another entry method. The exact approach depends on the property and plumbing configuration.
The access point matters because the camera needs enough space to enter the line and travel through the pipe without damaging equipment or plumbing components.
Step 2: Insert the Camera Into the Pipe
Once access is established, the inspector feeds the camera into the sewer line.
The camera head is designed to operate inside wet plumbing environments and usually includes built-in lighting. This illumination lets the inspector see pipe walls, joints, buildup, standing water, roots, and other visible conditions.
The camera is pushed slowly through the line rather than rushed forward. Moving too quickly can make small defects or important details easier to miss.
As the equipment travels, the inspector watches the monitor and evaluates changes in pipe material, condition, slope, and flow.
Step 3: Review the Pipe in Real Time
The live video portion is one of the most important steps.
The inspector watches for conditions that may restrict flow or weaken the pipe. A good review looks beyond one obvious blockage. It considers the line's overall condition.
Common findings may include:
- Tree roots entering through joints or cracks
- Grease, scale, or debris buildup
- Cracked or fractured pipe walls
- Separated or offset joints
- Corrosion in older metal piping
- Sections that appear flattened or collapsed
- Standing water in low spots
- Foreign objects or other obstructions
A sewer line inspection can also provide useful information about the type and general condition of the piping, which may help homeowners plan future maintenance.
Step 4: Watch for Bellies and Drainage Problems
Not every sewer problem is caused by a clog.
Sometimes a section of pipe settles lower than the surrounding line. This creates a low area, commonly called a belly, where water and waste can collect rather than flowing properly.
During the camera review, standing water can be an important clue. If the camera enters water and remains submerged across part of the line, the inspector may investigate whether the pipe has poor slope or settlement.
A belly cannot always be judged from a single image. The inspector needs to consider how the camera moves through the line, how long standing water remains visible, and whether buildup is collecting in the same area.
Step 5: Identify Pipe Materials and Aging Conditions
Different sewer pipe materials tend to develop different problems.
Older cast iron lines may show corrosion, scaling, or rough interior surfaces. Clay piping may develop separated joints or allow tree roots to enter. PVC can still develop issues from settling, installation problems, or damaged connections.
Understanding the material helps put camera findings into context.
For example, heavy scale in an older metal line may reduce the usable interior diameter. A separated clay joint may provide an opening for roots. A modern pipe with standing water may indicate a slope or an installation issue.
The camera shows visible conditions, while the inspector interprets what those conditions may mean for the property.
Step 6: Locate the Position of Important Defects
Some professional camera systems include locating equipment that can help identify the location of an underground defect.
The camera head may transmit a signal detectable from the surface. This lets the inspector or plumbing professional estimate where the problem is and, in some cases, how deep the pipe sits.
Location information can be useful if repair work becomes necessary.
Instead of opening up a large area based on guesswork, the repair professional can focus more closely on the damaged section. However, the appropriate plumbing or sewer professional should still complete final repair planning.
Step 7: Record the Findings
A professional sewer video inspection should leave the client with useful information, not just a verbal description.
Depending on the service, documentation may include recorded footage, still images, written comments, or a summary of visible concerns.
Clear documentation is especially useful during a real estate transaction. Buyers can review the findings with their agent and decide whether they need further plumbing evaluation before closing.
Homeowners can also use the footage when discussing repair options with plumbers or contractors.
The best reports explain what was observed without exaggerating the condition or claiming more than the camera can prove.
What Problems Can the Camera Miss?
Camera technology is very useful, but it has limitations.
A blocked line may prevent the camera from moving far enough to inspect the full pipe. Heavy standing water can also limit visibility because the camera may become submerged.
The camera shows only the interior surface visible at the time of inspection. It does not directly evaluate the surrounding soil, exterior pipe wall, or every hidden structural condition.
A dirty lens, heavy buildup, poor access, or sharp pipe turns can also affect view quality.
This is why the inspection report should explain any limitations. Never present an incomplete view as though the entire sewer system was fully evaluated.
Should the Line Be Cleaned Before the Camera Inspection?
It depends on the line's condition.
If the pipe is heavily blocked, the camera may not travel far enough to provide useful footage. We may recommend cleaning before another camera review.
However, cleaning before every inspection is not always necessary. In some cases, the existing blockage itself is important evidence.
The inspector or plumbing professional should decide whether the line can be evaluated in its current condition or needs to be cleared first.
The goal is to get a useful view without removing important clues before documenting them.
Conclusion
A sewer camera inspection gives homeowners and buyers a direct look at a part of the property that normally stays hidden. The sewer camera inspection process begins with finding an access point, inserting the camera, reviewing the pipe in real time, documenting defects, and explaining what the footage shows.
At Green Valley Home Inspections, we use professional camera equipment to help buyers and homeowners better understand the visible condition of their sewer piping. Our reports focus on clear documentation, practical explanations, and useful next steps.
Schedule your sewer camera inspection today to get a clearer view of what is happening inside the line.
Frequently Asked Questions
Does a sewer camera inspection remove a clog?
No. The camera is used to view and document the inside of the line. Cleaning, root removal, or blockage clearing are separate services.
Can the camera detect tree roots?
Yes, visible root intrusion often occurs when roots enter the pipe through cracks or joints. The footage can also show how much of the pipe appears affected.
Can a sewer camera identify a collapsed pipe?
A camera may reveal a collapsed or badly damaged section if it can reach the area. A complete collapse may prevent the camera from passing farther through the line.
Do I need a sewer cleanout?
A cleanout usually provides the easiest access, but other options may sometimes be available. The appropriate access method depends on the property and plumbing layout.
Should buyers inspect the sewer before closing?
It can be useful when buying an older property, when mature trees are nearby, or when the sewer history is unknown. The footage can provide information that a standard property walkthrough cannot show.
Disclaimer: The information on this website and blog is for general informational purposes only and is not professional advice. We make no guarantees of accuracy or completeness. We disclaim all liability for errors, omissions, or reliance on this content. Always consult a qualified professional for specific guidance.
Search
Certification
Green Valley Inspections is InterNACHI Certified, a Certified Master Inspector, and CCPIA-certified, demonstrating advanced training, extensive experience, professional ethics, and expertise in residential and commercial property inspections across Southern California.



Social Media
Google Reviews

5-star ratings from 440+ clients across Southern California.
Contact Us
Recent Post



Service Areas
We offer home inspection services throughout the following counties: